Showing posts with label Sewing. Show all posts

Wednesday, November 23, 2011

Felt Leaf Garland

Oh Sweet Pinterest.
How do I love thee?
Too much! That's how!!!

So. I was on Pinterest. Again. Duh. 
And I found THIS amazing garland.


I love Fall colors, falling leaves, and garlands to string up around the house! Perfect Project!
Elsie at A Beautiful Mess Blog has a great tutorial post on how to make your own! Go check hers out...and then check out the one I made:


I used felt I had on hand and cut out a LOT of leaves. A lot.


Awesome Autumnal Colors!


Did I mention I cut out a lot? A lotta leaves.


I had a golden/yellow embroidery floss on hand, and that's what I used to hand stitch the leaves together.


Again. A. Lot. Of. Leaves.

Time to string them up!


I really do love this garland. The colors are just enough to pop without being TOO much. It's simple, but so pretty! And, since it's almost time to take down the Fall stuff and put up the Christmas stuff...you have a whole year to make one for yourself!


Friday, August 5, 2011

Easiest Dress You'll Ever Sew!

When I was a little girl I loved summertime, because I could wear my stash of Sun Dresses!

So comfy! So girly!

Now I've got my own daughter to dress like a little mini me doll...er...to pass on the Sun Dress Love!

We were shopping at Wal-Mart back at the beginning of summer mainly to check out the crafty section. There are only two Wal-Marts left in town that carry fabric and the whole caboodle and so I drove my family 20 minutes out of the way to hit one!

I'm so glad I did, because they had this super cute Tinkerbell fabric. ALREADY shirred and hemmed! YaHoo! I didn't have my Little Ladies measurements on hand, so I stood her up in the cart and wrapped the fabric directly around her. Very professional.

This is so easy, I didn't even take photos. When we got home I re-wrapped her and pinned it to fit. You basically make an inside-out tube of the fabric by stitching up a side (or I did a back) seam. Then I measured the length she would need for straps and cut some ribbon I already had on hand. I stitched both straps into place. Turn it all pretty-side-out. Then I finished it up by stitching a button on the front of each strap.

Wanna See???


Easy Sun Dress Perfection. It makes her look ridiculously tall and grown up!

Oh. As I was doing this "photo shoot" our Middle One got into a huff about me not EVER taking HIS picture or blogging about HIM. So here is Mister-In-The-Middle...posing in his hand-me-down jammies.


First stop...Living Room Sofa Runway. Next stop...Cover of Fashion Magazine.


Tuesday, July 12, 2011

Dolly Diapers

For the past few months, Kat has been in tune to all things Potty. This is a good thing...it's making potty training much easier! She associates diapers and dirty pants with babies. And she doesn't see herself as a baby anymore (insert Mommy whimper), so she's passing it along to her Baby Dolls.

So when I saw THESE at 2 Little Hooligans, I flipped out! Sooooooo Cute! And a little wipes case to go with the diapers? Yes, please!

Here's how mine turned out:


2 Little Hooligans has a GREAT tutorial and I love the colorful fabrics to make Dolly Diaper Change Time more fun! However, when I tried to free hand a diaper shape...my non-artist skills reared their ugly head! I couldn't get a diaper that didn't look all wonky!

Enter Skip To My Lou! She's got a printable diaper template and I used the heck out of it!!!

I was ready to GO!

I picked out four different fabrics from a JoAnn's 99 cent fat quarter sale. I was going to buy some fleece (it's SO expensive...where do you get your fleece?). But then I remembered an old baby blanket in my up-cycle pile that was backed with white fleece. AWESOME! Then I picked up some velcro for the fasteners.

I printed out the template and cut out all my fabric and fleece. Then I followed all 2 Little Hooligans directions to sew everything together!


Whoops! A little bunched up...


Plenty of Whoopsies! as I went along...but...


All together, they look GREAT! And they are making a Mini-Momma-In-Training very happy!

Now, about those wipes...


I just used cheapy felt sheets that I had left over from other projects.


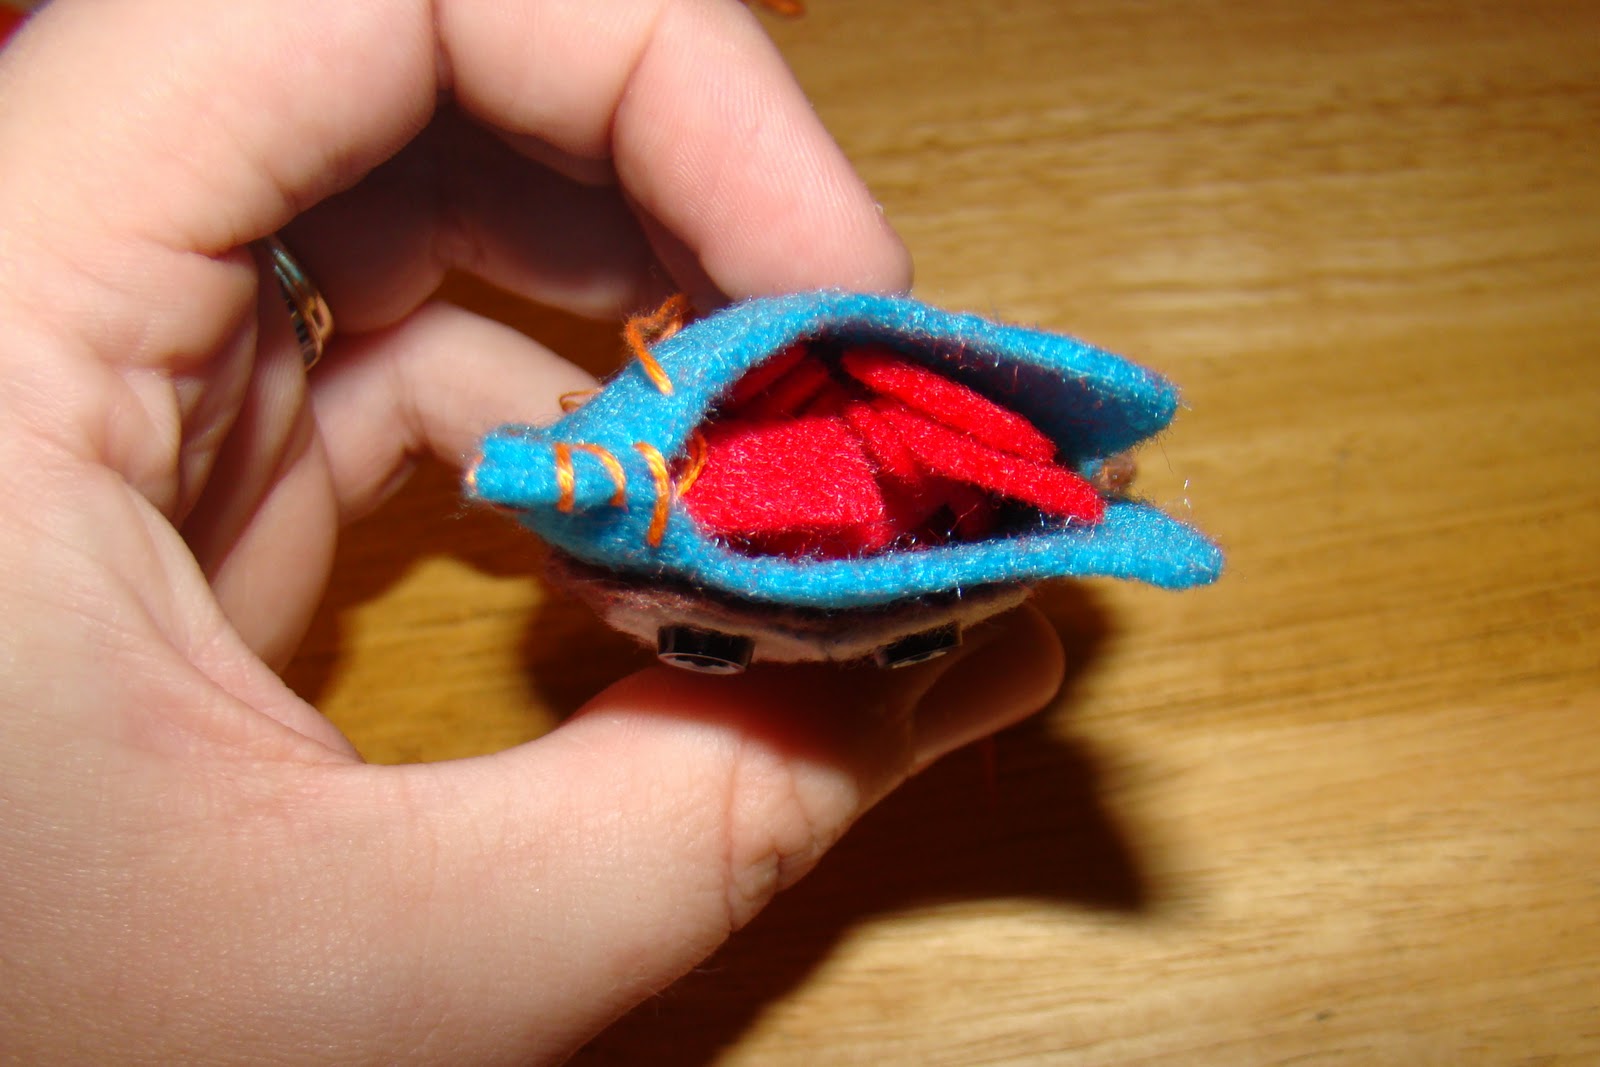
Open the top to pull out the "wipes"!


Here's the case and the pile of wipes. Again, I followed 2 Little Hooligans directions and I'm so excited with the way everything turned out!!!


Sunday, June 26, 2011

delicateConstruction Project!

Hi, all!
We're having a wicked Nebraska thunderstorm right now...complete with bright yellow sky. LOVE IT!
Not that I'm sure plunking away on an electronic gadget is smart when it's lightening out...but I'm just hoping we don't lose power before I post this! Fingers Crossed.

Now. Back in May I had the honor of doing my first ever guest post for delicateConstruction.
I just wanted to give you a little teaser in case you missed it!

HOT PAD HAND TOWELS!


C'mon. You know you wanna find out how I achieved this miracle in sewing!

Head HERE to find my original post...in it's original form...originally...eh. I'm rambling now. 
But really...go check it out!!!

Tuesday, May 3, 2011

Mustache Love

Kind of sounds like a song, doesn't it?

Meerkat Love?

MUSKRAT Love!

Anyway...back on track, Amy! I'm talking about Mustaches (Mustachi? How do you make that plural?)!

I'm sure you've noticed that they are EVERYWHERE! On mugs & glasses & wall art & cupcake picks...And Tom Selleck and Burt Reynolds are thinking, "I knew it would come back!"

So I wanted to share in some of the Mustache Love that's going around. That's how I came up with:


Muah-Ha-Ha-Haaaaa!

No, my three year old isn't jacked up on growth hormone injected junk food! He's sporting the super cool Mustache Key chain we made as a gift for his Godfather!

I'll be honest. I didn't take a lot any photos of the process...because I didn't think it would turn out so darn cute! But I really like it...so I'm sure I'll be making some more! I just HAD to share NOW!

So here's what I did. I went out looking for some leather, but I found this gigantic roll of bumpy black vinyl at Hancock Fabrick for super cheap! I bought a small piece and I could probably make 100 more of these babies out of it...it goes a long way!

I did some searching for mustache silhouettes online and found a nice, stereo-type 'stache and sized it just right. Then I printed it out and used that as a template. I cut out two. Then I put the "wrong" sides together and did some mustache trimming (heeheehee) to make the pieces match up exactly.

I used black thread and whip stitched the pieces together. I thought this would be tough with the material and the double thickness, but it wasn't too bad! On the tip of one side, I wanted to add a loop for keys. I (or you) could add a piece of ribbon, or material to add the ring, but I just stitched it right on the tip of the mustache. (You can just see the metal of the ring on the left side)


Now. Really. I'd love to stay, but I've just found my keys and MUSTACHE!


Photobucket

Cross your fingers...
I'm entering this in:

Thursday, April 28, 2011

Skirts, Challenges, Mile-Stones...Oh MY!

First thing is First! This is my 100th Post!

Cue the Trumpets. Toot. Toot. Tootin' my own horn!

I really enjoy my little Blog World. It's slowly building up...considering I took 4ish months off! :) I'd really like to get crackin' this next 100 posts, though. Maybe do some guest posting...have a guest post-ee...get some sponsors! Baby steps!!!

Okay. Now. Down to business.

A couple of weeks ago (seems like yesterday) I did a post regarding Funky Polkadot Giraffe's "Bookmarked from Blogland" Challenge. We were supposed to pick a project we had bookmarked and get-r-done! Today we're meeting up over at Funky Polkadot Giraffe to Linky Up what we accomplished!

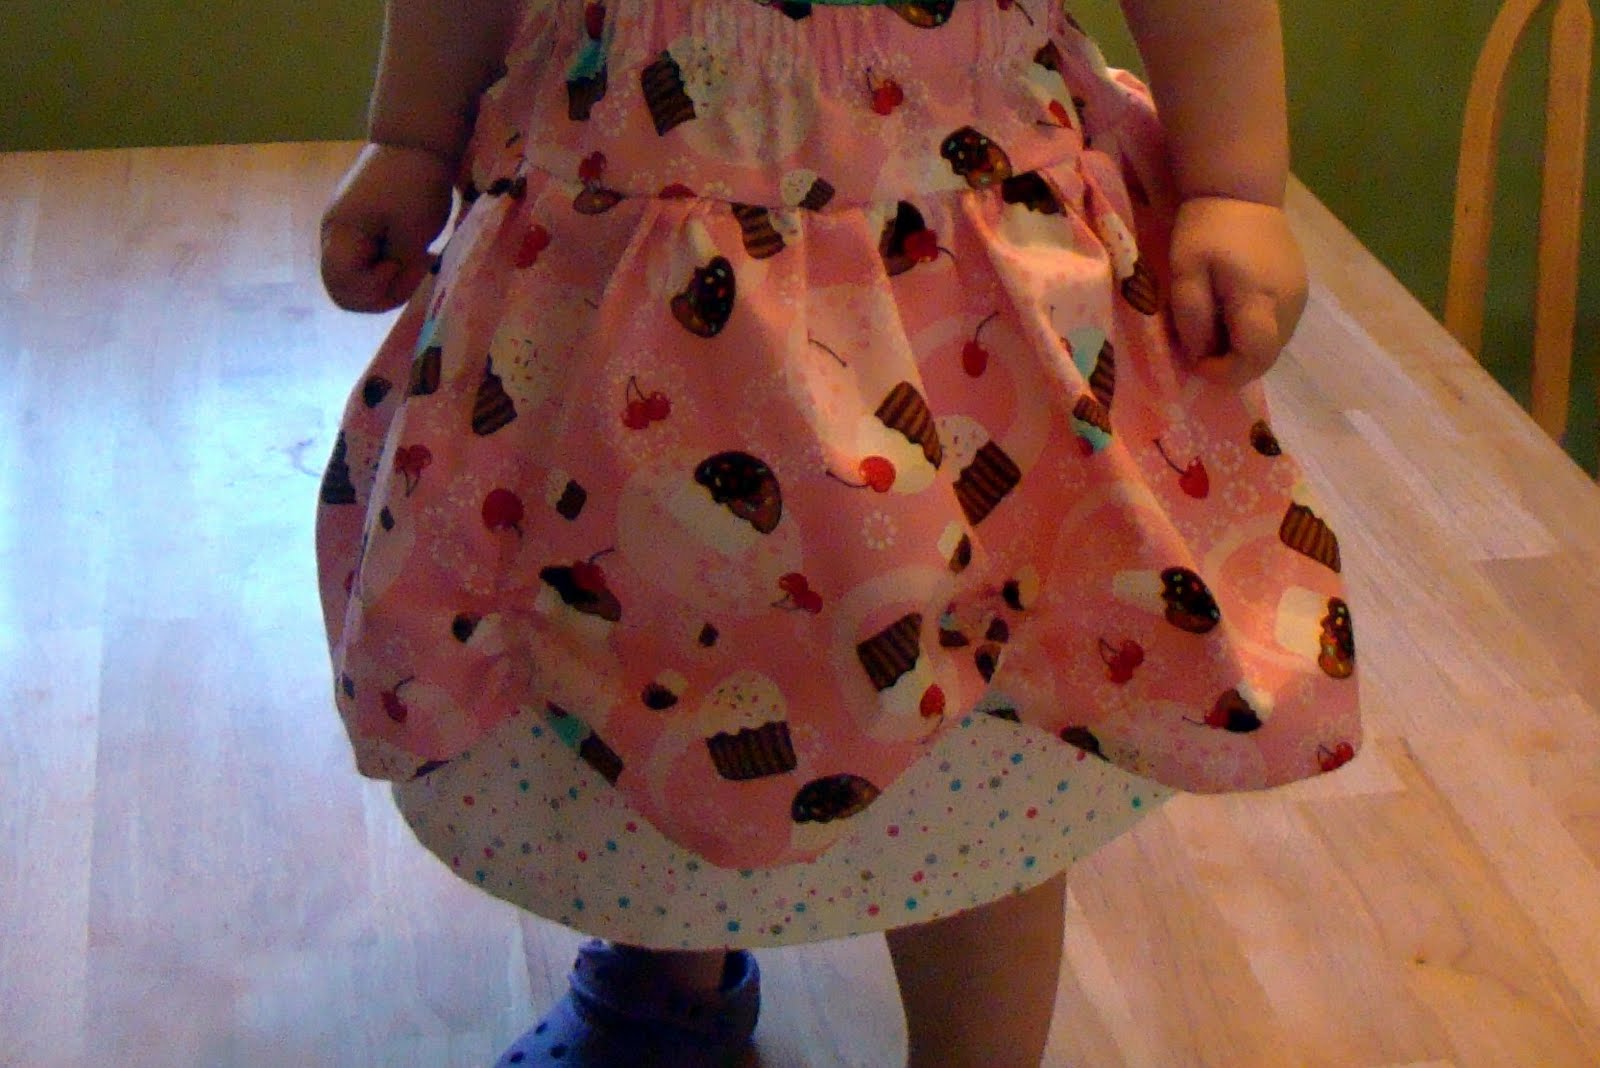
I picked this Adorable Scalloped Skirt from Ameroonie Designs. And...guess what???

I DID IT!

Toot. Toot. Tootin' my own Horn!

I'm such a newbie at sewing. But Amy {she is totally my new hero} has such an awesome tutorial...she made me look like I knew what I was doing!!! I want to give her a big virtual squeeze! Please go check her out...I can't imagine the amount of work she put into making this skirt tutorial. It is FANTASTIC!

Wanna see the result of her genius and my blind blundering???


Perfect Girly Puffi-ness!
Lady Kat is going to have a Cupcake Themed 2nd Birthday and she'll be wearing this!

Don't think my hall tree is doing it justice? Wanna see it on a live model???
Alright. Since you said, "Please!"

I couldn't get Lady Kat to stand still...even with Goldfish Bribery.

I, also, sorely need a new camera.


Okay...she will seriously be the Bell of her Ball! And if you look quick enough...doesn't the skirt almost look cup cakey in itself? With a dollop of pink frosting? And sugar on the top!

Photobucket

Tuesday, December 21, 2010

Folksy Felt Snowman

Busy, Busy, Busy!!! I'm feeling the crunch as the time tick-tocks towards Christmas Eve/Day. We celebrate on Christmas Eve with my side of the family and Christmas Day with my hubby's side. The kiddos are over-the-moon excited about everything and I'm crafting, wrapping and baking like a lunatic. By the way...am I the only person in the world who thinks of the Fresh Prince of Bell Air when someone mentions wrapping??? RANDOM!

So. I'm up in the air about today's ornament. I found this cute little guy here. And how easy and simple! It was love at first sight. Then I tried to make him. Not so much. I'll let you be the judge:


Isn't he kind of Nightmare Before Christmas? A mixture of Jack and what's-the-girl's-name? Is my felt too white? Eyes to vacant? Or is it the zombie-stitched mouth? Well...I LOVE the way his nose turned out. That's something!

Friday, December 10, 2010

Felt Button Bulbs

Happy Friday, Everyone!!!

Here is the ornament of the day:


I was feeling all Felt-tastical after my cute little felt owl from yesterday. I had visions of felt ornaments dancing in my head. Anyway...I think this turned out kind of cute. The buttons kind-of creep me out, though. They remind me of those new dolls that are out with the button eyes. And those dolls creep me out because they make me think of the movie, Coraline. Which, I'll admit, was a great movie...but on the disturbing side.

SO! Now that I've talked myself through my button-phobia, back to the ornament! I just plopped down some green felt and I used the bottom of a mason jar to outline a circle. I cut out two circles and then placed one down to arrange the buttons, like so:


I played around for awhile and ended up liking the three buttons that are on the finished piece. I stitched the buttons on first and then whip-stitched the two pieces of felt together, stuffing the middle before I completely sealed them up. Then I added some string to hang it with! Very easy!

But...there is a dark side to this ornament...I actually made TWO, but one ended up getting scrapped. As I was whip-stitching away (I really DO need to practice that more) my eyes strayed over to my bottle of tacky glue. And I thought, "Hey! We used that stuff ALL the time back in Girl Scouts when we worked with felt!" So I tried to glue my other ornament together. Yeah. Didn't work! Roll Ornament Blooper Footage:


Everything seemed easier in Girl Scouts!!! But I DID rescue the buttons to use another day...

Thursday, December 9, 2010

Felt Owl Ornaments

I have a long term affection for owls. There was a super cool velvet picture of an owl in my great grandparent's basement that I loved to look at when I was little (I wonder what happened to that?). Anyway, I am delighted that they seem to be making a come back!

And I was even more delighted when I found this at U-create! I clicked on the link and followed the tutorial and now I'm going to share it with you!

I started out at Michael's and went hog wild in the felt aisle. I can't believe the awesome colors of felt that they have! I settled on some funky colors, so maybe Miss Sassy Owl can hang out somewhere around the house even after Christmas. Next, I printed out the templates from the original poster, Jessica at Juicy Bits. Then I cut everything out. Time to assemble my owl!

I had these mini-black buttons to use for eyes. This is where I started.


Then I stitched the eye-balls onto the next piece. And attached the beak. Already...so cute!


Then I attached the hot-pink tummy part and the wings. Then it's time to start stitching the front of the owl to the back of the owl. I decided to use a whip-stitch. Which I haven't used since 8th grade Home Ec. So my stitches are a bit...uneven...! When there was just a little bit left to go, I stuffed her! I didn't have any official stuffing and I didn't want to buy any. Instead, I've been saving scraps from other felting projects and I cut them up into tiny bits and used them as stuffing. Worked great!!!


Then I finished stitching the last bit and it was time to hang Miss Sassy Owl on the tree!


I LOVE the way she turned out! Now I just have to work on my stitching skills and I'm ready to make a flock! Are a bunch of owls called a flock? Or are owls more solitary? Whoooo knows!?!

Sunday, April 25, 2010

Baby Legs

Disclaimer: I am NOT a sewing whiz (or even a sewing mini-whiz). I took Home Ec. in Middle School and earned a solid B. But ever since having our daughter I've got this crazy sewing-crochet-crafty itch.

So my husband & children got me this awesome sewing machine for Valentine's Day and I'm practicing away. Said daughter is now crawling around the house and her little knees are taking a beating (don't ask me why this didn't bother me with the boys!). These Baby Legs are everywhere and cost a LOT of money, so I did a little research and decided to make some of my own.

Now. There are many ways to make these. A lot of sites I viewed just cut off the foot part and sewed a simple hem either by hand or on their machine. Yeah. Didn't work for me! These socks roll up after you cut them! So I found this tutorial here...and like the idea of making cuffs. Either way...the Baby Legs turn out cute as can be and for a fraction of the cost when you make them yourself!

To start with you need a sewing machine (or thread & needle), scissors, woman's knee socks (the ones I used were on sale at Target), an adorable baby or toddler & some Johnny Cash on itunes (optional, but soothing & fun).

Here are the socks in their original state.
1) Cut the socks directly above and below the heels and above the toes.
2) Discard the heels & toes and you are left with two pieces like this:


3) Take the smaller piece (that would be around your foot) and fold it in on itself. Make sure that the nice part of the sock is on the outside of the fold. This will be the cuff.
4) Stretch out your newly folded cuff and insert the cut line of the other piece inside the cuff. You'll end up with three raw edges together. Note the crazy rolling! I pinned the three layers together in four spots.
5) I stretched the entire thing around the arm of my sewing machine to stitch. Use whatever method is easiest for you, but make sure you are only stitching three layers and not all six or you won't be able to pull these on your babies cute chubby legs!

6) Stitch all the way around the sock. I did one with a tight zig zag stitch and one with a straight stitch just to see the difference. I ended up liking the straight stitch a lot better. I'm not sure, but I think that with the material of the sock and my complete lack of knowledge on sewing matters, the zig zag got all bunchy for me!

7) Finally...fold your newly sewn cuff down and you have achieved Baby Legs! The top one is the zig zagged one and the bottom one is the straight stitched one.

Grab your Super-Speedy crawler and put on her new Baby Legs! The smile says it all! These make great knee protectors, leg warmers, they make diaper changing easier than tights do, a nice lightweight sock would be great for sun protection.

But mostly they make chubby Fred Flinstone feet HaPpY!